
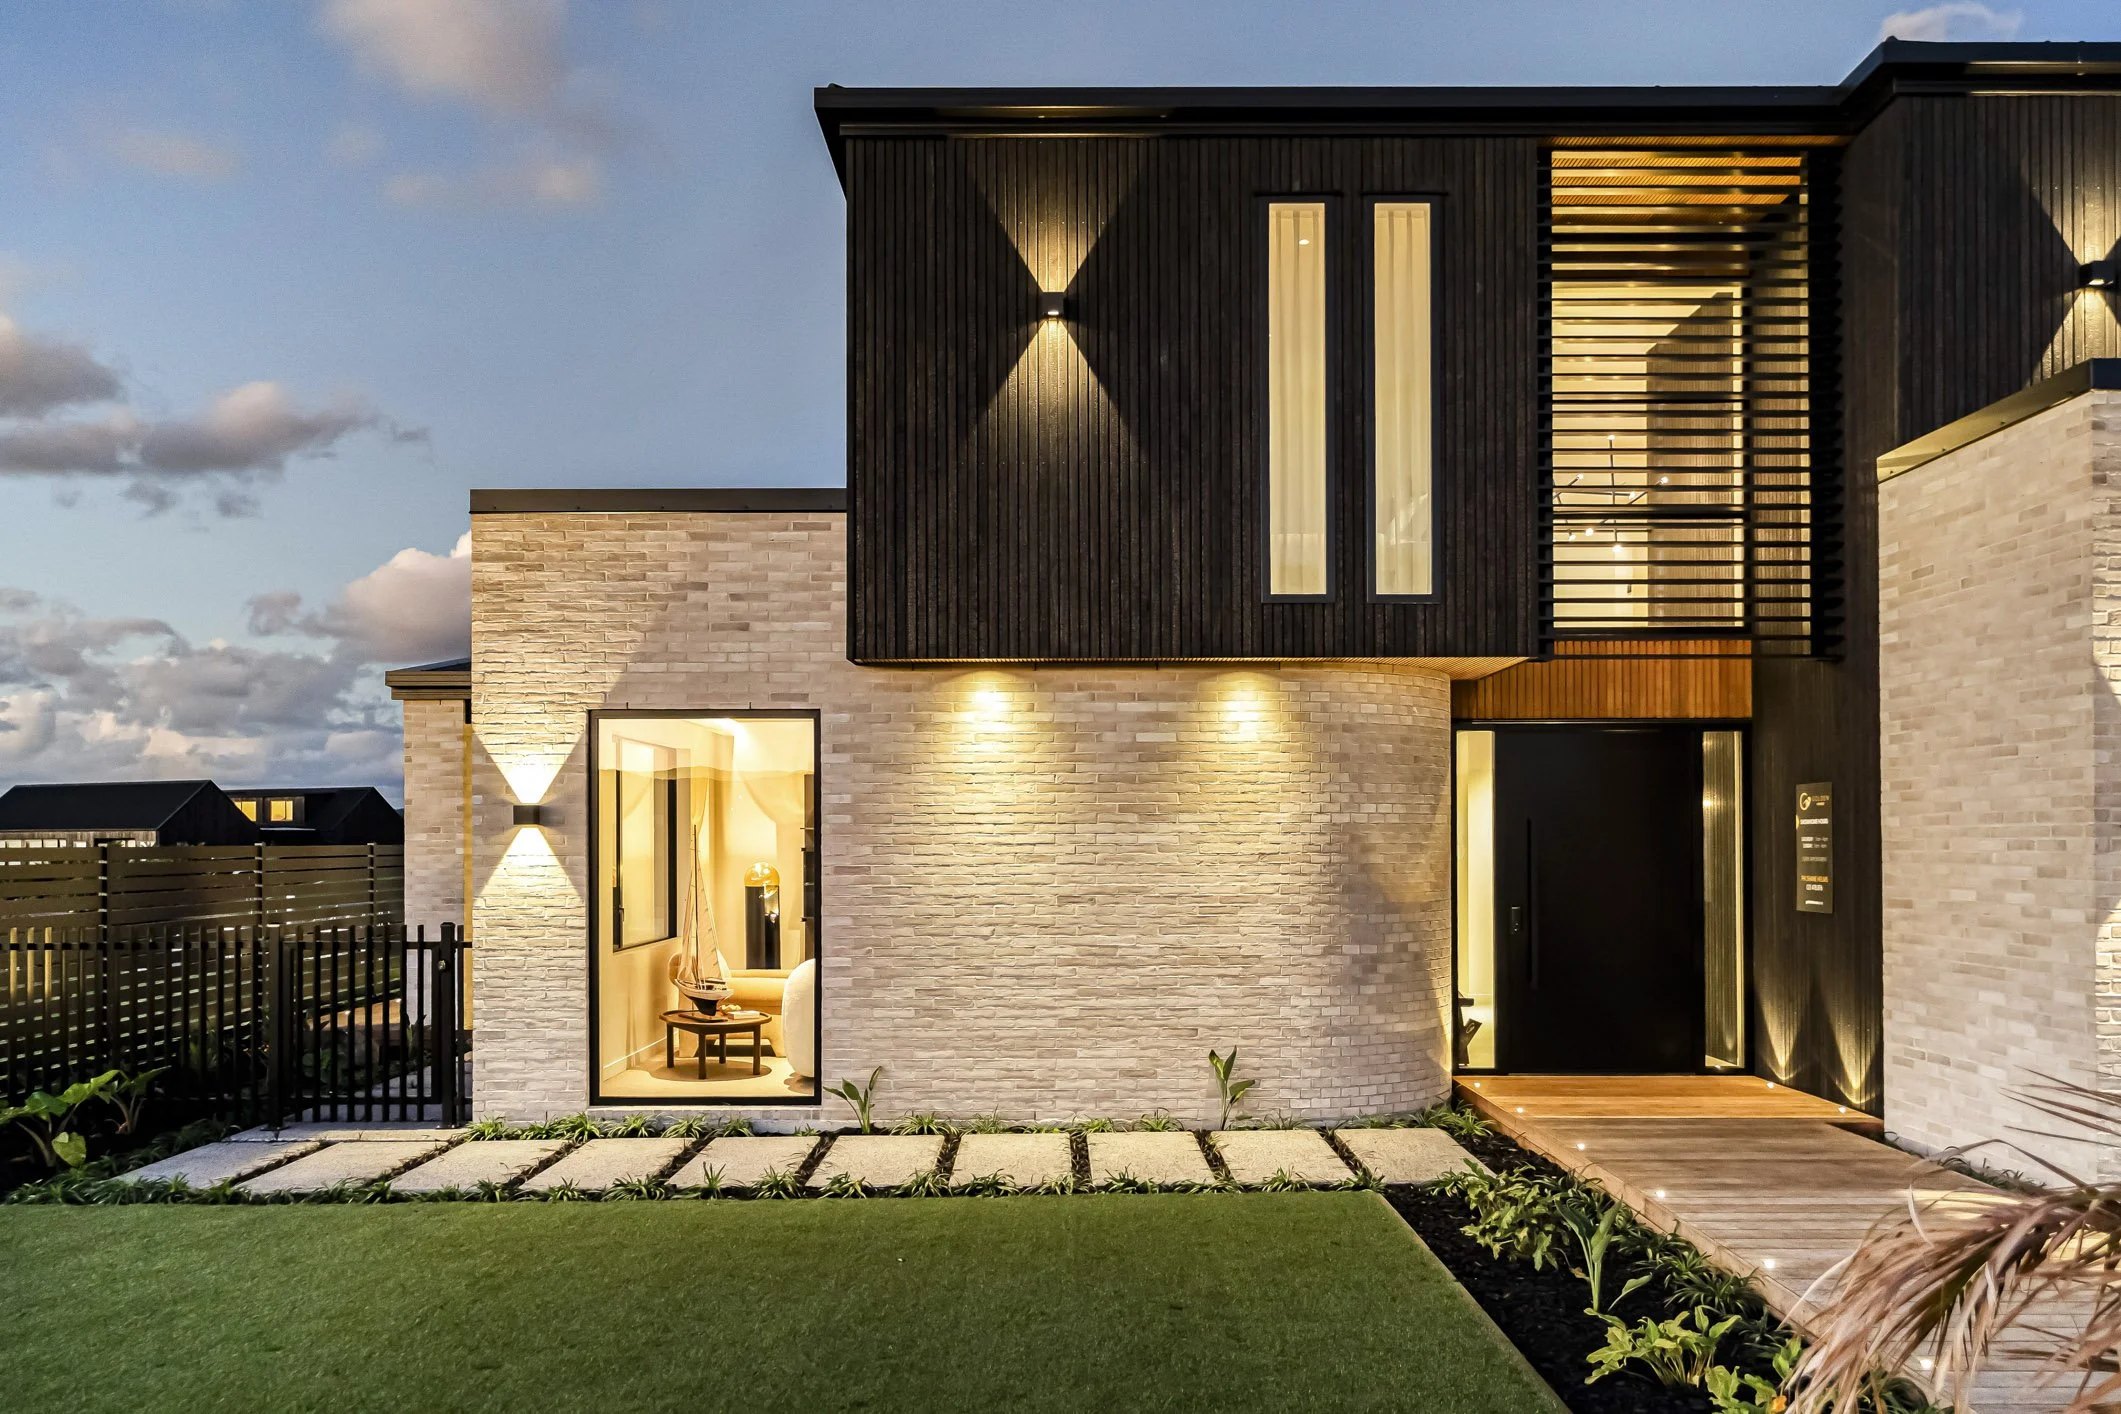
Before booking photography of a completed building or interior, settle three things: what the images need to demonstrate, whether the project is ready, and when the light will best reveal its strongest features. If several businesses want to use the photographs, agree their requirements and usage arrangements before the shoot.
Those decisions shape everything from the shot list to the time we arrive.
Start with what you want people to notice
“Photograph the house” is a starting point. A more useful brief explains what makes this particular project worth looking at.
An architect might want to show how the building responds to its site, how rooms connect or how daylight moves through the space. An interior designer might prioritise materials, colour, joinery and the relationship between furnishings and architecture. A builder might want prospective clients to see the quality of the finish and the kinds of homes their team can deliver.
These priorities can overlap, but they deserve a conversation.
Tell your photographer which features matter and where the images will appear. A wide website banner asks something different of a photograph than a portrait social post or a close-up in a project brochure. Knowing that early helps us plan a useful set.
A Golden Homes example:
showing the home in its best light
Golden Homes approached us to photograph a completed home in Marsden Cove, Northland. The brief was to create hero images that demonstrated their building capabilities and supported a new website page.
We chose late afternoon and twilight because the home had features that made both worthwhile: extensive glazing, timber detailing, outdoor living and a waterfront setting.
The afternoon light brought warmth into the interior and helped show how the home welcomed the sun. As daylight faded, the illuminated spaces and connection to the deck offered another way to present the same building.
The purpose was to give Golden Homes a varied selection with different uses and moods, while keeping the home itself at the centre.
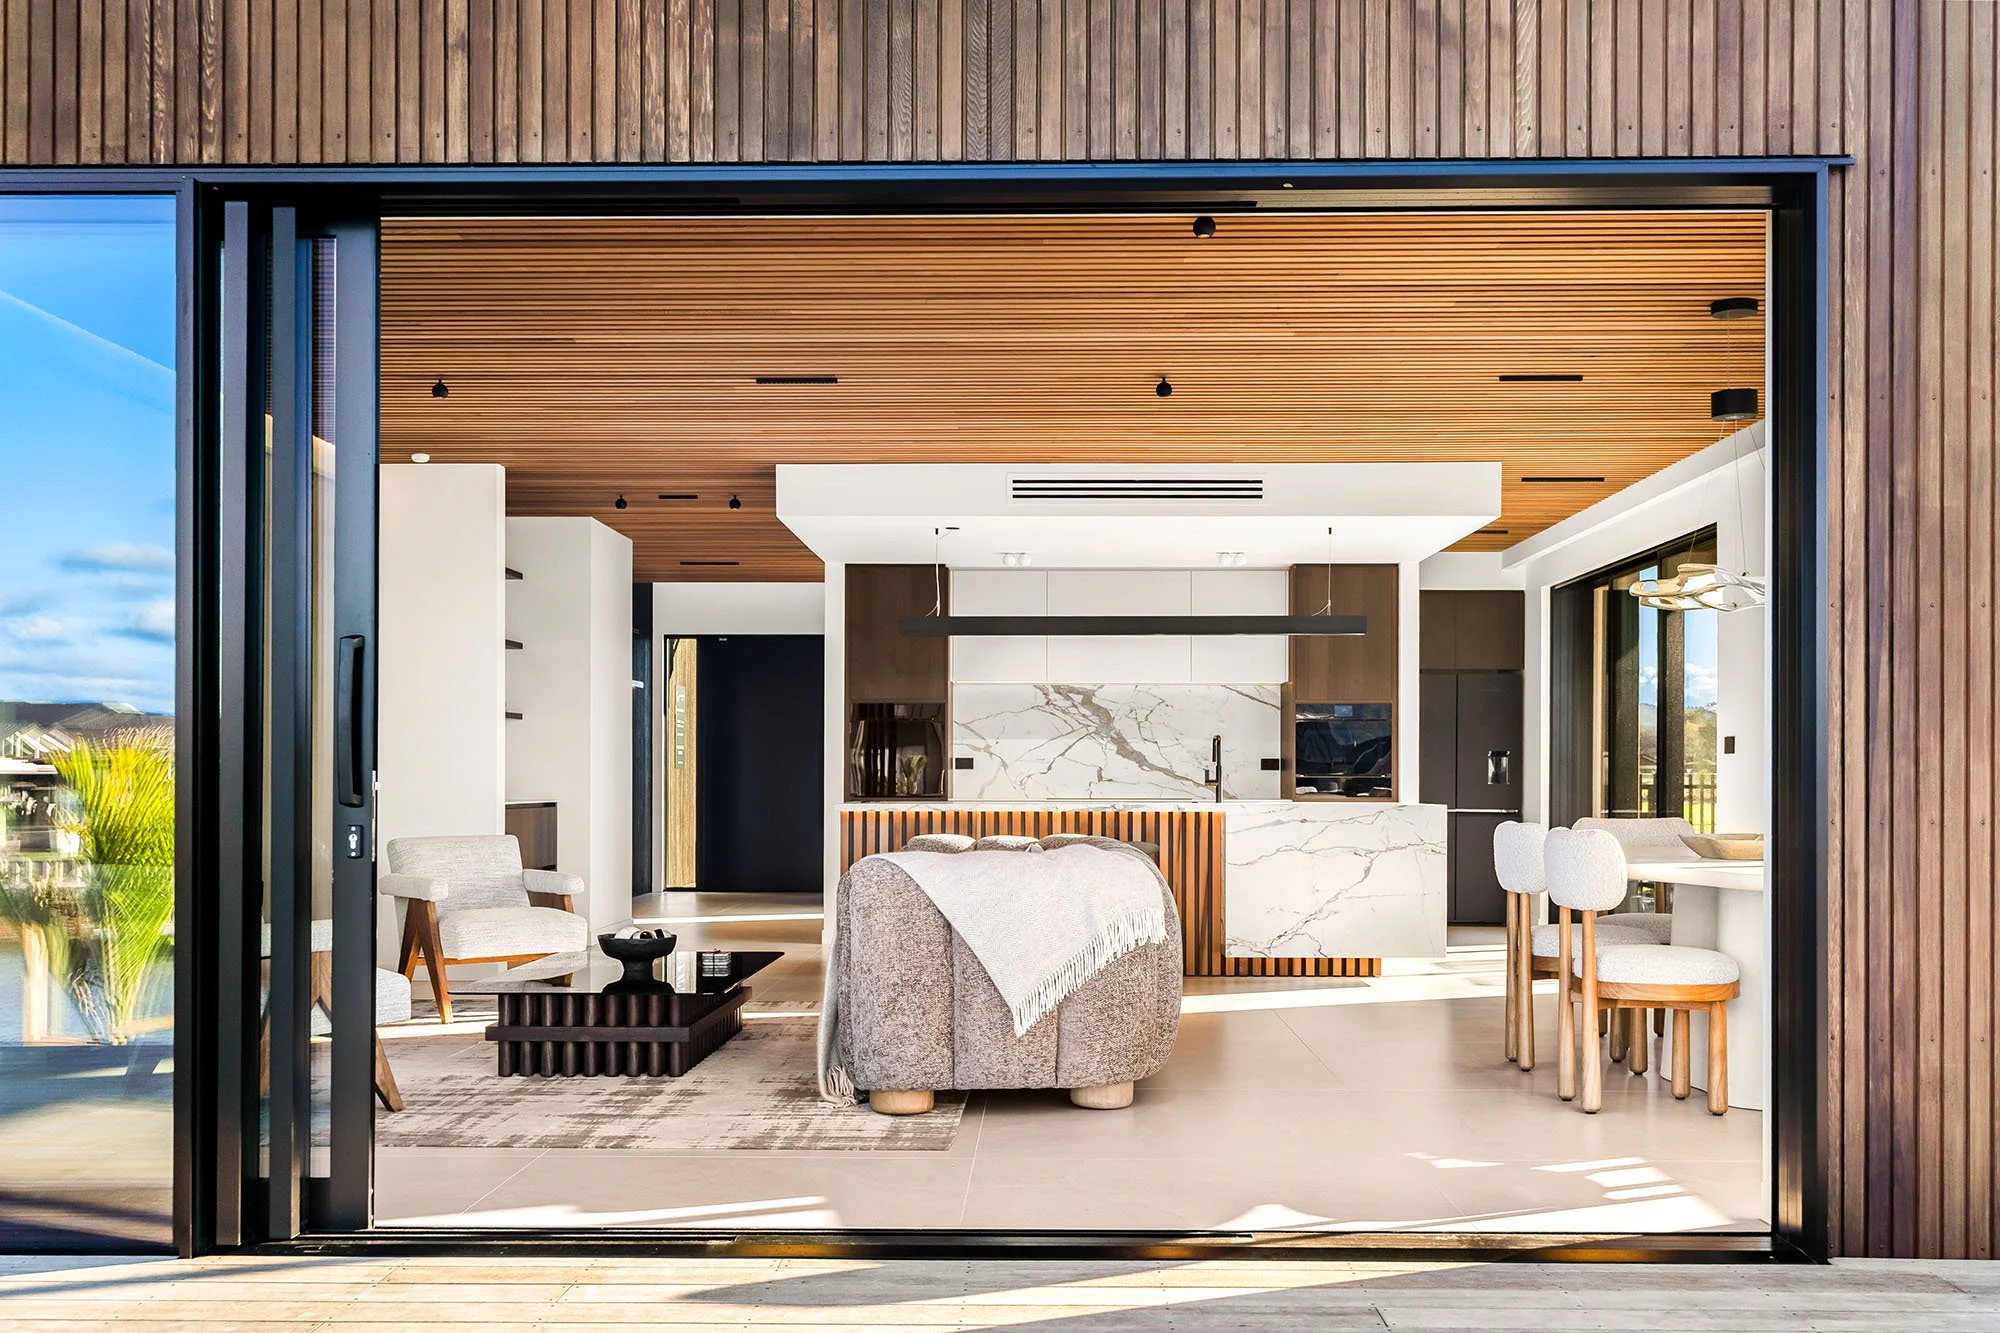
Golden Homes, Marsden Cove. The view from the deck connects the outdoor space, living area and kitchen, while bringing the timber detailing and afternoon light into one composition.
Photograph: Jaimee Delemare, Up Imagery
In Jaimee’s photograph above, the open doors frame a view through the living space to the kitchen. You can understand how the spaces connect without needing separate photographs to explain every transition.
The exterior timber and interior ceiling both remain visible, giving the materials a clear role in the image. Sunlight across the deck and floor adds warmth without obscuring the details the client wanted to show.
That is a useful question to ask when planning a shoot: what relationships should someone understand from the photographs?
Choose twilight when it adds something
Twilight is worth considering when the home has something meaningful to show as daylight fades: substantial glazing, considered exterior lighting, illuminated landscaping, outdoor entertaining areas or a view that contributes to the scene.
It doesn’t need to be part of every booking.
If there is little exterior lighting and no particular evening feature to highlight, a daytime shoot may cover the brief well. Morning or late-afternoon light can also give the photographs warmth and depth without extending the shoot into dusk.
Start with the features and the intended images, then choose the timing. The most useful option is the one that serves the project.
Finish the finishing touches
The Golden Homes shoot ran smoothly. Across other projects, the things that interrupt photography are often the small tasks left until the end.
Windows still need cleaning. Paint buckets and spare timber remain on site. Landscaping is partly finished, or light fittings haven’t been installed. Pieces of masking tape marking defects can still be visible around the home.
Individually, these may seem minor. Together, they affect which views are ready to photograph and how much time is available for the actual shoot. A paint bucket is rarely the hero shot anyone had in mind.
Before the day, check:
Glass: windows, sliding doors and mirrors are clean.
Finishes: visible work is complete, with defect markers removed once the relevant work has been addressed.
Lighting: fittings are installed and working, including exterior and landscape lighting needed for evening photographs.
Site presentation: tools, spare materials, packaging and trade equipment are cleared from the spaces being photographed.
Exterior: decks, paths and driveways are clean; agreed landscaping is ready.
Styling: furniture and accessories are in place, with time allowed for final adjustments.
Access: someone can provide entry and operate doors, blinds and lighting.
If something won’t be finished, tell us beforehand. We can discuss whether the planned views still work or whether a later date would better serve the brief.
Coordinate project partners before booking
We usually work with the person or business commissioning the photography. Occasionally, several project partners arrange the shoot together.
If the architect, builder and interior designer all want images, bring their requirements into the initial brief. One shared shoot can accommodate several perspectives, provided the scope allows for them.
Choose one person to coordinate access, readiness and the combined shot list. Agree which photographs are essential for each partner so competing requests don’t first appear on the day.
For a jointly arranged shoot, partners can agree to split the shoot fee, with each paying for their own image licence. If another business wants to use the images later, we arrange that use separately.
The agreement should identify the organisations using the images, the photographs supplied and the permitted uses. Mention websites, social media, advertising, publications or award submissions when relevant, so the quote and licence reflect what is actually needed.
Send a short, useful brief
You don’t need a polished presentation to get started. Send us:
The project location and expected completion date.
Who commissioned the work and which partners need images.
The spaces, materials and design features that matter most.
Where the photographs will be used.
Any access restrictions, unfinished work or deadlines.
A few current phone photographs or plans, if available.
Up Imagery is based in Whangārei and regularly works throughout Northland. We have also completed work in Auckland and are more than happy to travel elsewhere in New Zealand, with travel arrangements included in the quote.
Explore our architectural photography, or tell us about your finished project. We can help work out what to capture, when to photograph it and what needs to be ready.
